
If you’re having trouble with birds perching on your property and you’re fed up with the mess they cause, then there are a few options available.
The bird control market is vast, with various methods and equipment used to deter and control all types of birds. However, one of the most common and potentially most effective methods is bird spikes!
This article will talk you through the purpose of bird spikes and show you how you can easily install them yourself.
What are Bird Spikes?
Bird spikes are one of the best long-term solutions for bird control on the market. They act as both a visual and physical barrier to birds, preventing them from gaining access to specific areas. This will encourage them to move on from your property and find somewhere new to perch.
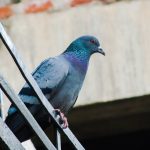
Primarily, bird spikes are designed to protect against pigeons and other similar sized birds. This is because pigeons are the most prevalent pest in the bird world and most likely the type of bird you’re looking to protect your property from.
There are also options for larger or smaller spikes available depending on the type of bird you’re having problems with; larger seagull spikes with long pins to accommodate their longer legs and smaller, more dense spikes for sparrows and starlings.
Bird spikes are available to buy from all pest control suppliers. However, you should aim to buy from a trusted bird proofing supplier to receive the highest quality products used by professionals.
Are Bird Spikes Humane?
Despite how they look, bird spikes are actually a completely humane deterrent. While the pins and spikes can look intimidating, their purpose is not to harm birds.
Birds won’t ignore them and decide to perch on such a dangerous-looking object – they’re much more intelligent than you would think! Therefore, it is highly unlikely that a bird will injure itself on bird spikes.
In fact, the RSPB recommends them as one of the best long-term methods for bird proofing buildings. If bird spikes were inhumane, then the Royal Society for the Protection of Birds wouldn’t be recommending them!
How Much Does it Cost to Install Bird Spikes?
That depends on you! You could pay somebody who knows what they’re doing and get a pest control professional to complete the task, thereby ensuring the spikes are installed correctly the first time.
Or, depending on your budget, you could purchase a tube of silicone or another suitable adhesive and fit them yourself!
This all depends on how competent you are at DIY tasks, the height at which you’re placing the spikes and overall personal preference.
Steel Vs Plastic Bird Spikes
Bird spikes tend to be made from either steel or plastic, but which is the right choice for you? The fundamental differences are mainly cost and looks.
Plastic is a cheaper option. However, it tends to stand out more against your property as they usually have thicker pins.
Steel is a slightly more expensive option, yet they are usually thinner in size and blend into the background much better than the plastic option.
If cost isn’t an issue, we recommend going with the steel option. Not only do they look better, but they are also much more durable and guaranteed to keep your home free of birds for way longer. Plus, they’re not as damaging to the environment!
How to Install Bird Spikes at Home?
If you’ve decided to go the DIY route, then carry on reading! We’ve put together a guide for installing bird spikes at home:
- Clean the surface. It’s essential to remove all debris from the area you intend to apply the bird spikes to. Be sure to clear all bird droppings and any nesting materials the birds may be using before you do anything else. Remember that bird droppings are one of the leading ways diseases spread, so please wear gloves and a mask to protect yourself and your loved ones when carrying out this task. Once you’ve removed all the debris, give the surface a good clean with a disinfectant, ideally a mixture of bleach and water, to remove any bacteria left behind by the birds.
- Select the correct size. Bird spikes come in a range of different widths allowing them to be utilised across all building types. Measure the area where you intend to place your spikes and purchase the most appropriate ones. For example, if birds are nesting in your guttering, you would buy narrow spikes to fit on the pipes.
- Choose an adhesive. The appropriate fixing method ultimately depends on the material you are installing the spikes upon. The most common method used is an adhesive silicone which you can easily apply to the base of the spikes before securing them into place. Adhesives are more useful if the material you are working with is metal or plastic. Alternatively, if you intend to fix your spikes onto wood, say a window ledge, you can use screws in the base to secure them. If neither of these options are for you and you’re looking for a more temporary solution, you could always fix the spikes in place using zip ties; however, this is only a provisional method and will not last for long.
- Install. Using your selected fixing method, secure the spikes into place in your affected area. Make sure not to leave any gaps between the spikes as birds will land and nest in gaps as small as an inch wide.
Follow this guide to bird proofing your property today, and say goodbye to bird poo and cooing noises forever!


